Showing posts with label Projects. Show all posts

Happy Mother's Day

This special post was submitted by our interior design partner Yolanda Ellis in anticipation of Mother's Day.

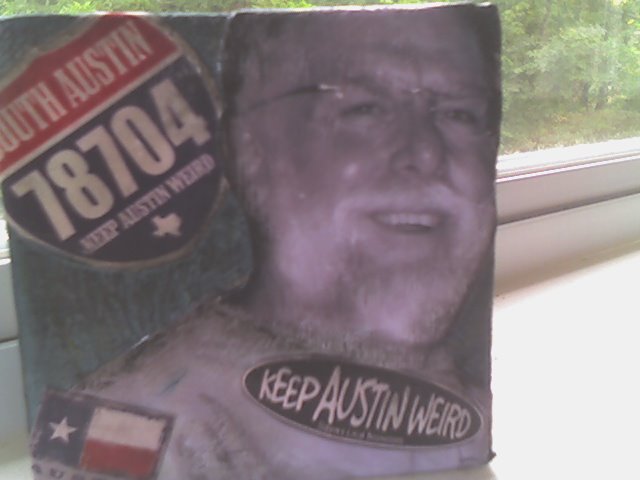
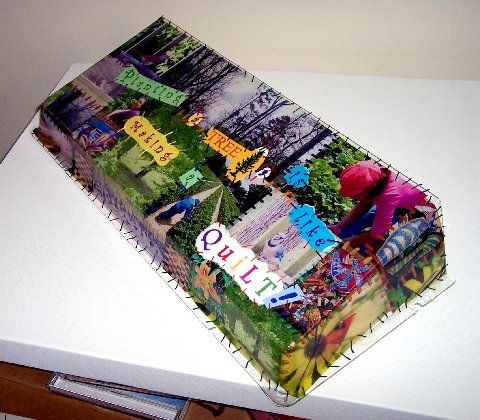
Decoupage is a crafting technique of decorating an object by gluing paper onto an object. This is seen on boxes, frames or other objects that you can think of that can be covered or decorated with paper. The idea to decoupage a vase with memorable mother and child pictures was inspired by my many occasions when my lovely husband blessed me with beautiful flower arrangements for Valentine's Day, birthdays or a just because I love you day.

I am a working mom and love fresh flowers on my desk but I also love having pictures of my loved ones around me. Every time I would get new flowers, I was faced with the dilemma of too many things on my desk. I have to remove some pictures to get my flowers on my desk or put my flowers somewhere else. Well I have learned over the years that one problem for one person adds up to be a problem for many others. Then the light bulb comes on..why not decoupage all the pictures you love on a vase.

Then you can conserve space and you can have your flowers and pictures too. As a mom what great joy it is to come to work and see pictures of your loved ones and topped with a beautiful floral arrangement especially with your favorite flower(s). My favorite is the Anthurium plant. I love tropical plants. By using a plant potted in your special vase this does not last for just one week of joy but all year long. This is a handmade gift that is personalized with love.

Design suggestions:

- Any planter can be used to do this technique

- For Mother's Day - use pictures of vacation, special moments that you both shared, notes of inspirational words, poems.etc. Decoupage this on the planter you selected.

- Herbs can be planted in the vase as an alternative to flowers or plants for the Mom who likes to cook and they place it in the kitchen or window seal.

- This is also a great gift for Moms in nursing homes or assistant living centers for a gift that keeps on giving.

- You can also embellish the containers with a unique ribbon or word magnets from Artistic Lifestyling


How to do this project:

Items needed:

- A vase or planter or container
- Decoupage glue - found at your local hobby store Picture here
- Dry cloth
- Scissors
- Pictures/poems/inspirational words
- Sponge brush
- Ribbon
- Embellishments, optional but highly encourage to apply with a hot glue gun
- Hot glue gun (use to adhere embellishments)
- Potting soil (if using to plant herbs or a plant)
- Plant or herb or fresh flowers

Directions:

1. Choose your container and make sure it's clean and dry

2. Gather your pictures - and photocopy (either all black and white or all in color)

3. Make a collage with the pictures on the table before you start gluing.

4. It's helpful to brainstorm before you start.

5. Use photo copies instead of original pictures.

6. Make sure the ink is dry if you have printed them from an inkjet printer at least 24 hours

7. Then tear the pictures to give irregular edges or cut them to give them a clean edge.

8. Once you decide where you want to place the pictures on the vase then start gluing the pictures onto the vase or container. Cover each picture thoroughly with glue or artist gel medium. After the entire vase has been covered with your pictures then apply 2 layers of decoupage glue. Allow the vase to dry for 1 to 2 hours.

9. Finally plant your Mom's favorite flower, herb or place a fresh bouquet of flowers inside.

Inspiring Design Travel

We have been working diligently on creating some new things for you. I'm very excited at all the progress the team has made. All of this has taken me away from blogging regularly, but to whet your appetite before the launch, I thought I'd tell you about our series of inspirational shopping excursions around the globe.

This whole idea came about when I realized that I am guilty of having too narrow a focus when it comes to design and creativity. Although nature is inspiring, I won't always find the inspiration I seek in my own backyard. I have not only a desire, but a strong need to go out and explore; and I figure there are others like me. So, you're invited too.

These trips we are planning are primarily intended for interior designers, decorators, creatives, and DIYers. Together we will discover the unique characteristics of each destination from a design and creativity perspective - we will explore foods, fabrics, textiles, and assorted handmade goods - and of course, we will do some major shopping.

Now, one of the trips I am most excited about will be to Peacock Pavilions in Marrakech. One reason I am so excited by this trip is because I love architecture. Maryam and her husband are in the midst of creating a fabulous place. Take a look . Even though it's not finished, it is utterly breathtaking right? Then take a look at all the unique finds.

All of the plans for each of the trips are still firming up, along with some other plans for design classes and destination events throughout the US. We would love to have you along. So feel free to email me if you are interested in joining us!

All the best,

Lise

acoupalathings

Hi everyone!


This has been a long week - and I am so looking forward to spending some time off at home next week shopping, researching some new recipes, baking, prepping and cooking.

But before that, I still have a few details to wrap up for the painting project for the wall

above.

We'll get started on painting this project at the end of the month. It is a very cool curved wall created for an upscale salon in this area.

I so wanted to do a Moroccan theme with a beautiful pattern bringing in various earthy colors with a subtle glaze over top. But alas, we are probably going with a Venetian plaster finish in a warm ochre color. Yes, I think the color is a good choice for the dark wood finishes in the space - but I still fancy the other theme better.


And in other breaking news...


I also ran into my local Barnes & Noble this week and spotted a copy of Amy Butler's new book, Midwest Modern


pictured here -------->


What immediately caught my eye in the first few pages was Amy's description of Art & Life.


"I think that in everything we do, in every style of life, there is art to be found. Not just in the studios of talented artists, but in the gardens, homes, relationships, spirits, voices, and fashions of people you see every day."


If you know anything about my creative passions, you can see immediately why that quote resonates with me...


So I'm looking forward to reading Amy's book; and learning more about her approach to art and living.

What are you reading?

You just have to visit...

Stop on by and see what Lisa Oglesby is up to. I absolutely love these little pincushions she has created.

Hmmm... I am wondering if she has an Etsy store....

Enjoy!

Lise

SuMmER vaCAtiOn


When I was in elementary school, in those days just before summer break started, it was hard to keep from daydreaming about all the fantastic things I would do when summer break finally arrived. And boy, when school was finished there was no better feeling in the world! That is, for about 2 weeks. At which time I'd always declare my boredom and sheer displeasure with life as I knew it in a small town.

But happily, I managed to survive, largely by tapping into my imagination and creating something fun and useful from basic raw and scrap materials. Today, there's really no reason to ever complain of boredom - not when you can take those same raw materials and combine them with new technologies to produce wildly creative summer theme projects.


Here's some SuMmER CrEatIviTY IdEaS to get you started...


  • Work with teens to craft a handmade product and sell it on etsy

  • Make scrap quilts and frame them

  • Build a tree fort (my favorite)

  • Visit the museum or the library for inspiration

  • Document your summer projects with a digital camera. At the end of the summer create a photo collage for their room

  • Grow a sunflower house using giant sunflowers for the "walls"

  • Make a mural on the wall

  • Plant a terrace garden, or tomatoes in a pot

  • Make stepping stones for the garden

  • Paint rocks

  • Send handmade postcards from your vacation spot

  • Make your own monsters

  • Make a creative space

Start your own list now to keep both you and the kids busy, creative and active over the summer.


We would love to share your creative summer projects with our readers, so be sure to send pictures!

Inspire me Thursday - Light


This week's Inspire Me Thursday prompt is Light.
I've recently been drawing these for my son Ethan. I put these on little yellow stickies and he sticks them to his chest and tells me he's Mr. Sunshine.
Enjoy...
Lise

Emotional Connections to Things


My studio is not ready for prime time. So I'd hesitate to share a wide-angle view of it on places like Studio Friday. Yet it is the place I retreat to when I am interested in making collages, or when I'm ready to scan illustrations and blog.


When I moved, I rediscovered all types of creative stuff (beads, tools, canvas, paper, craft glue, ribbons, fabric, books, portfolios, etc.). And because I claimed the living room as my designated studio space, the movers dumped every randomly-connected art supply there.


Fast forward a few months, and my art making in that room has slowed considerably, because of too much clutter!

What a fabulous conversation I had with my friend Cheryl Finley today. One of the many topics we discussed was letting go of past stuff. We discussed the emotional connection to things. After our conversation, I realized that I am emotionally connected to creativity. How in the world can I throw anything away - especially when there's nothing wrong with it!?!?? Yet, my studio today feels a little stifling and that is cutting down on the time I spend there to create.


So I'm now in search of a swap situation. I'm offering lots of creative materials, tools, products, books, etc that I've outgrown and are no longer serving me. If you're interested in the possibilities of purging things that don't serve you any longer, please send me an email or enter a comment below. If I have enough interested parties, I will set up a studio stuff swap group to trade useful studio/art/creativity supplies.


Let's put the energy back into our spaces.


Be Creative!


Lise

Keep Austin Weird


I just now finished this little collage project for my co-worker, Austin. A few weeks back, we went to Austin Texas for a conference. Austin being in Austin ,Texas was weird in itself - ya know because the signs with "his name" were everywhere. (I was only used to seeing his name on emails and documents!)


I knew I had a collage project in the making - if nothing else, but to to capture the link between his name and his weirdness (just kidding Austin!)


So I'll bring this into the office on Tuesday and hang it on his cube somewhere.


Keep Austin Weird!


The Kid's Sunday Project

I wanted to plant something new, the kids wanted to paint. So we teamed up and this is the end result...

Materials:

Paint and Metallic Glaze
Foam brush
Dirt
Clay Pot - 18"
Vine

Unpacking My Life

I am living amongst a sea of boxes. (A good illustration of how I feel (including the wine) can be found on Penelope Dullaghan's website.) Unpacking has been an exercise in organized chaos. Meaning that boxes were labeled so they've landed in the right room; but sometimes it is difficult to know just what to do with the contents! I love my new home but I'm finding that some of my art which I created for specific rooms in my other home feels a little out of place here. I suppose that is why my sister Toni told me that I should purge while I pack. This was a good suggestion - I was just too overwhelmed to follow her sage advice. I am still waiting for her bill. (She's the organization queen).

Anyhow in addition to finding some renewed energy and an urge to begin a new garden, I'm also feeling like building more book shelves and painting things in funky color palettes.

It's also time to plan a new manifesting change collage project - as soon as I unpack my art supplies. I wonder where those are.....

Have a wonderful and creative week.

Lise

New Workshop Leader

I meant to tell you all about a newly licensed Artistic Lifestyling instructor. In addition to design services, Marja Chapman will be teaching Fear of Color Workshops in the Washington DC/Northern VA area. You can reach Marja at her website for information on her schedule.

Cheers!

Lise

Style Points: Silk Paint & Home Furnishings


So in a previous post about milk paint, I received quite a response both on and offblog. Who knew it was such a popular topic?!? So this week I though I'd take a quick look at silk painting and it's use as a decorative home furnishing.


One of my planned projects is of a brownstone building on silk. Brownstones have always been one of my favorite architectural images. Painting this particular image on silk will give the building an interesting finish; mostly because of the resist. Once the silk is painted, I'll frame it within a border of richly-colored velvet fabric; not only to compliment other dye colors chosen, but to give it weight as a wall hanging.


To paint on silk you'll need the following basic materials:


Silk painting doesn't require an extensive art background. It's pretty easy because you use the resist to outline your pattern, and use the dye to fill in the lines. Painting on silk is similar in some ways to watercolor painting because the dye tends to spread on the silk in the same way that watercolor spreads on paper. But it doesn't spread beyond the resist (gutta) lines. The color of the dye tends to show up very vividly; making a striking addition to your home decor.


If you want to give it a try, visit this link for more information; I've found that the directions are very comprehensive.


Once you've made a few silk scarves, try creating the following projects to decorate your home:


  • Custom Decorative Pillows

  • Screens to divide rooms

  • Wall hangings -Both large quilt-sized pieces, to smaller framed or unframed silk scarf size

  • Lamp & Chandelier shades

  • Art

  • Custom Drapes (Silk is a delicate fabric and will fade. Drapes should be lined to give weight to the silk)


Resources:

Workshops:
Books:

Manifesting Change Collage Projects

Art Projects Can CHANGE your LiFe


CoLlaGe is the way I capture ideas. Ideas that remind me of my goals and dreams. It is also the way I capture memories of people I love and care for.

Collage also helps me bring my dreams to reality. Just in the same way dream journaling and goal setting bring about the changes you want to see in your life - certain collage projects do the same, but are infinitely more fun than making my usual lists.


Most of these photos are from my house manifestation collage project. Since I have been searching for a new home and thinking about future property investment goals; I set out to create art that would remind me to stay focused on finding a new home.
So the key to this type of collage project is to keep your thoughts and choices focused on your goals. That way when the project is done it becomes an ongoing reminder of your intentions. My thoughts focused on my love of interesting architecture, brownstone buildings, and city skylines; then it evolved from there.

I prefer to work on canvas instead of paper. I use acrylic paint, new and printed paper, prismacolor metallic pens, gel medium, and a little bit of time. Most of my projects are finished within two days. Occasionally, I will ask one of my kids to help - or vice versa.


So - the result of this particular project?? In under one week's time we discovered our new house and the offer was written up. Lest you think this is something magical - I think not. No, I think it's the powerful combination of being in that artful zone AND focusing on your goals and intentions at the same time.

So this year, as you set your Creative New Year's Resolutions, plan a little Manifesting Change Collage project and see where it leads. Hey you never know!

Be well!

Lise

____________________

Plan, Organize & Design your own Creative Project Files


Plan, Organize & Design your own Creative Project Files


I create a project portfolio to hold all of my thoughts, product specifications, and other details in one place. I use it for home and garden design; party planning; art projects; and workshop designs. In fact, I encourage my clients to create their own project portfolio to capture information about the projects we work on together. My early portfolios included only loose sheets of paper which easily grew disorganized. But with better planning and a few hours prep time, my project files have become much more organized. If you're interested in making your own portfolio to document your projects, these basic materials will get you started:

  • Push pins
  • Graph paper
  • 11 x 17 paper
  • index cards
  • page protectors
  • page tabs/dividers
  • Cork design board
  • Business card pockets
  • Vinyl/Plastic zippered pouches
  • Drawing/Illustration Pens & Markers (Prismacolor is my favorite brand )
  • Two small journals - one lined, one unlined (I like to have a journal that lays flat as well, that way I can use the scanner to save designs in electronic format.)
  • A zipped binder, an artist portfolio, or large binder with rings


When you shop for the contents of your project files, try to personalize them in a way that inspires you. I shop in office supply stores, scrapbooking and paper speciality stores, art & craft retailers, home & garden, hardware and housewares stores to mix things up. Of course you're free to assemble your materials in a way that works for you. But this particular selection of materials will allow you to sketch, collect, store, transport and file. I like to use a cork design board that stays on the wall to see multiple things together, like swatches, photos or other inspirational items. If I need to take them on the road, I just pop them into the zippered pouch in my binder and I'm off.

Take some time to document your next creative project. Combine your sketches with idea journaling; take digital photos; save magazine photos clippings; gather paint chips and other materials. Make models, explore and above all...

Be creative!

Lise

______________

Can you paint it? Yes you can! More ideas for creative walls...

When we were kids, my cousin Melanie had permission to write on the door to her room. Before the door was eventually painted over, she has created a collage of graffiti-like names, drawings, and sayings. It was cool, but in my childhood home, it was definitely prohibited. Even though I was encouraged to paint and draw, my creative activities were mostly limited to paper. Walls and doors, even in my own room, were not an option.

Today it's different. Walls and doors are just another canvas. We use chalkboard paint on entire walls to keep track of schedules and to create transient murals. We have large bulletin boards on our doors for collections of fabric, trim, color swatches, and party/event concepts. Walls are the perfect canvas for creating on a grand scale. And even though it's never really permanent, it is very visible to everyone that enters your home and this, my dear reader, is where people become fearful, hesitant and doubtful. Deep down, many of us long to create something on our walls. Murals, wall words, etc. But instead, we freak out and hire an artist to do it. Sometimes, the only difference between you and the artist may be a lack of creative confidence.

Here then, are the baby steps we can all take on our way to our own biggest, grandest wall project ever:

  • First give yourself permission. That's what your mom and grandmother had to do when they first marked on the walls to track the growth of the kids and grandkids. Even if it was in pencil.

  • Then make a list of all the things you'd like to create. Don't edit yourself. You can do one or all of the projects you identify. Keep adding projects to the list, save it in your project inspiration file.

  • Next - go shopping. Gather your materials you'll need for your project at online and offline craft, artist/hobby shops, home decor and home improvement centers. Don't forget your friends. Sometimes all you need is a small amount of paint. Your friends may just have the colors you need sitting in the storage bin. It never hurts to swap supplies and save money!
  • Next choose a spot for your project. There are many locations that would be ideal for a creative project. Besides the largest walls and doors in your room, try the space over your doors, the unadorned step risers, the area over your washer and dryer or bathroom mirror, or trim around your windows or doors.

  • Take a deep breath, relax, and map out your project. You're now building your Creative Confidence! You can use chalk to outline directly on the surface, or create a design concept board or sketch. Experiment with the colors and decide what will be your most dominate color. Even though you've made a good plan, some of the best projects happen in the moment. Remain open to your possibilities while you're in the process of creating.

  • Ok, so this whole idea of freehanding may still be a bit scary for you. And if that's the deal, you can minimize the fear by creating (or purchasing) stencils for some uniformity. I mention purchasing hesitantly - not because there aren't great stencils on the market, but because I think you'll achieve a greater sense of satisfaction when your project is done. You can also use tracing paper - I think I've mentioned that in another blog post...

  • If you're still nervous about creating directly on the walls; or live in a place where you're prohibited by a lease or other restriction, then create on canvas. A large canvas is just as good as a wall mural - and you can take it with you when you move. Using an unstretched canvas you might also try to create a mural for your floor (also known as an art floorcloth).
  • When you're done, document this success in your project files and start on your next project!

Be creative and enjoy the process!

Lise

__________

Style Points: Creative Tables

Accidents happen. But accidents can be turned into something beautiful. I'm not talking about the accident with your Thanksgiving turkey; I'm talking about the broken china and other pieces you can use to create a beautiful table.

So this holiday, when your special guest accidentally drops your last Lenox plate, pick up the pieces and be creative! When the holiday hoo-ha settles down, you can start designing and executing a table for Thanksgiving 2007!

Here are some directions for making something beautiful out of any broken dish accident!


Mosaic Tables

Materials:
tile
broken china (flat pieces)
marbles
broken glass (tempered auto glass from the auto glass repair shop works very well for mosaics)
grout
water
large sponge
tile adhesive
tile cutters
table top

Directions:
Map out a design for your table or other structure. Depending on the surface, you can transfer the design using transfer paper or just wing it. I'd suggest doing something unusual. If you're taking the time to create a mosaic, you might as well do something spectacular!


Find Inspiration Here

And Here Too!

Break the tile or china pieces into desired size. Use the tile cutters to clip edges as required.

Apply tile adhesive to the back of the tile or china piece. Apply to the table.

Once all tile/china has been applied, grout and let dry.

Wipe all grout away with the wet sponge.

Then set the table for the kids (or the grownups) and enjoy a good meal!

Be inspired!

Lise
___________________

Other Links:

Broken By Design:

Mo Ringey


Broken Back Mosaics

France Art Realisations

Majolica Mosaics

Style Points: Creative Home Project Files


In my last post, I talked about taking certain aspects of your lifestyle with you when you're traveling. I guess it should be no surprise that part of my traveling arsenal would include my creativity kit. I can't go anywhere without a way to doodle, sketch or take notes about something. Though my Moleskines are full of new design ideas, this is nothing in comparison to my style project files I keep at home. Actually, files are an understatement. Library seems more accurate.

So what's in my project files? Well, they can be classified narrowly by home and garden design; art and workshop design projects; and food and event plans. However, each area naturally bleeds over into the next. So that when I plan a party for my friends, I may sketch out the seating arrangements, traffic patterns and table scapes. And when I do a new art project, I also map out the steps for how to transform it into a workshop.

At a minimum, my project files always contain journal sketches, product lists, material specifications, room layouts, resource names/addresses, color/material swatches and inspiration/wishlist type comments for functional and emotional considerations.

In our October Artistic Lifestyling newsletter, I disclose how you can plan, organize and consult your own portfolio so that you can begin to articulate your ideas for creative home projects. If you'd like to subscribe, the link can be found on our website.


Be creative!

Lise

Style Points: Living Away from Home

I do a fair bit of traveling for my job. After my first several business trips, I discovered that when I am on the road it is important to treat myself well. A night spent alone in a nice hotel, with room service and a good movie or book can be a real blessing. An extended stay, however, can really start to bring on homesickness. So, here are my tips for taking your 'lifestyle' on the road:

  • Stay connected - Time stands still for no one, and I don't want to miss important events and deadlines. Organizing and planning allow me to easily keep in touch with what's going on at home when I am away. My favorite is a blank notebook, but you can choose from engagement calendars, phonebooks, notebooks, or electronic devices/PDAs. All the important details stay with you and make it easy to stay in touch.
  • Photos - In the back of my planner I have pictures of my family. This used to be sufficient, but now with the latest round of baggage restrictions I left the large planner and my photos behind. But no bother what with all the online photo storage providers; I can access family pictures where ever I am in the world through my internet connection. Luckily you don't even need to lug a laptop through security as my phone gets me connected to the internet in a snap. I guess this is a new twist on the "picture phone"!
  • Scents - Have you ever stayed in a non-smoking room that reeked of smoke anyway? I have! And trust me when I tell you it's no fun for a non-smoker. So now, if I am staying overnight anywhere, I always bring scented travel candles to freshen the hotel room. Even when there is no stale air, the candles familiar scent helps me relax in the new environment.
  • Portable creativity - Any seasoned traveler spends a great deal of time waiting around in an airport or between meetings. My portable creativity "kit" includes a moleskine journal, markers, and pens. I can take it out and sketch my surroundings; plan an event; doodle or dream journal. Making the wait in the airport - well, bearable.
  • Bring a good book - My girlfriend and I were discussing a few new books she began reading on her last business trip. A week-long convention allowed her to finish an exciting new novel in a few nights time; a feat that may not have been completed if she had been at home. Traveling allows for many reading opportunities, so I don't travel without having something good in my bag. Check out our gift shop, where we feature our recommended books and products related to our blog posts. You might find a good book for your next trip!

Enjoy your time away!

Lise

Home Arts Inspiration


I thought I would share a recent email I received from my friend Valarie Jean Bailey. She writes:


Dear Lise Richards

Your Artistic Lifestyling Blog Site is ever so inspiring. The green color scheme of your
graphics is cooling to the eyes and adds tranquility to one's vision.
I especially want to comment on your Family Collage Workshop, it did indeed inspire
me.


I was designing wall pockets for a commission from a NC children's museum, when I came upon your workshop. Using family & friends photos & pix from my backyard bird sanctury, I made the attached wall pocket.

Thank you so much for your wonderful creative & inspiring ideas.

Valarie Jean Art Quiltz


Valarie Jean, you've taken the collage project to a new level. This is amazing!

Thank you for sharing!!

Lise

Style Points: Fall Front Door Decor


Each September, my mother used to drag out a well-loved, (but kind of tired looking) bundle of Indian corn to hang on the front door. This usually heralded the start of the Fall season. While my mother had a decent artistic flair, I'm kind of shaking my head in wonder at why she would want to use the same display. (Especially when the Indian corn was missing a few more kernels each year!)

Nevertheless, adding a seasonal touch makes our house more inviting, but it's always a good idea to shake things up a bit. So to that end, here are some changes you can make to your entrance that help create a wonderful first impression!

  • Start at the curb - If you happen to have a rural post, you can dress your mailbox with festive fall decorations, stencil, paint or just use elegant weather-resistant stick-ons. The curb is also a great place to add those beautiful mums!
  • Dress the door - Unless you live in a Victorian style home, the general rule of thumb on painting the exterior of your home is to use no more than three colors . This might show up in trim colors around windows, a color for shutters and one for the door. If you've got only two colors on the outside of your home, it might be time to choose a new stand out color of paint or stain for your front door. See how the door in the photo really stands out?
  • Create and hang your beautiful fall wreath and make sure it is completely secured. There is nothing worse than thinking someone has come for a visit, only to find out it's that wreath a-knockin'. Wreath projects are a wonderful tradition to start with your kids. Don't limit yourself to what you see in the craft store customize it. Ask your kids to paint something and add it to your wreath.
  • If your harvest decor usually includes the requisite pumpkins and gourds, consider something new. A great project for kids are decorative luminaria. Usually luminaria are brought out for the winter holidays, but there is no reason I can think of to wait. Draw vivid pictures on white paper sacks, secure them by pouring sand in the bottom, and add a votive candle. A simple and beautiful project. Luminaria are a wonderful way to light up the night; a thoughtful touch for visiting guests; and this creative lighting plan certainly doesn't look like a runway for circling airplanes!
  • Finally, ensure your garden beds are tidy, walkways are clear of debris, cracks, dents or chips. Consider resurfacing, adding a new stone or brick veneers or using commercial concrete stains for walkways that have seen better days.

I hope to post some of our own luminaria photos. I'd love to share your photos here and on our website too. Be sure to email me photos of all your projects!

Be Creative!

Lise